Extrude
Push a closed sketch straight out into 3D to make a new part, or to add to, cut or intersect a part.
- Extrude EPart workspace toolbar
| SchoolCAD | Onshape | Fusion | SOLIDWORKS |
|---|---|---|---|
| Extrude | Extrude | Extrude | Extruded Boss/Base Extruded Cut |
Extrude is how most parts start. You draw a closed shape in a sketch, and Extrude pushes it straight out to give it thickness: a rectangle becomes a board, a circle becomes a dowel, an outline becomes the side of a phone stand.
The same tool also cuts. Extrude a shape into a part with Remove to make a slot, a pocket, a finger hole or a hole right through.
How to use it#
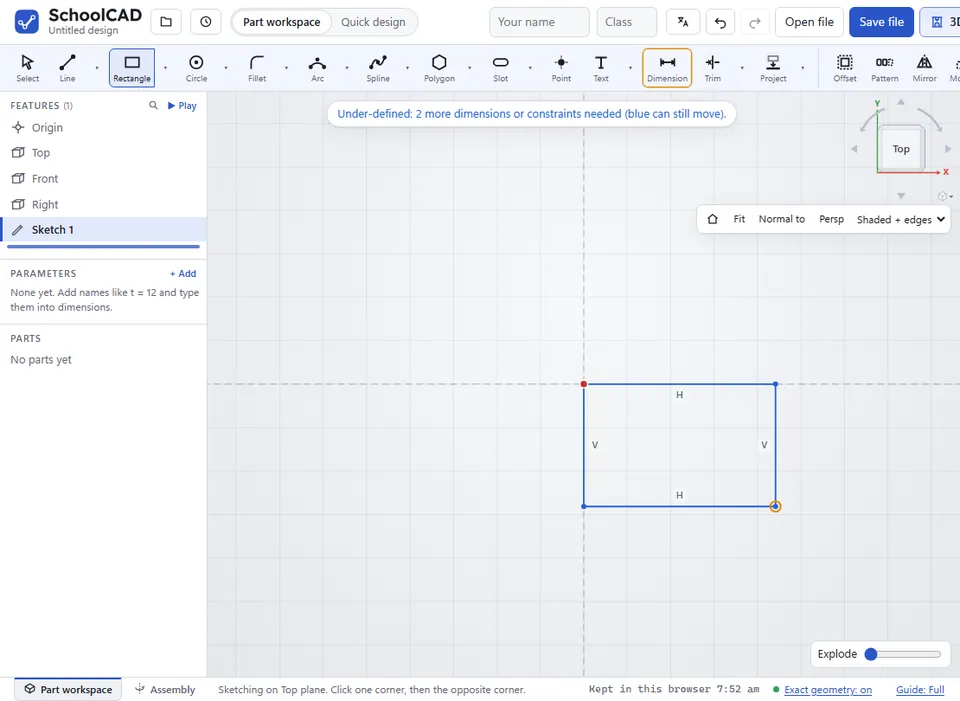
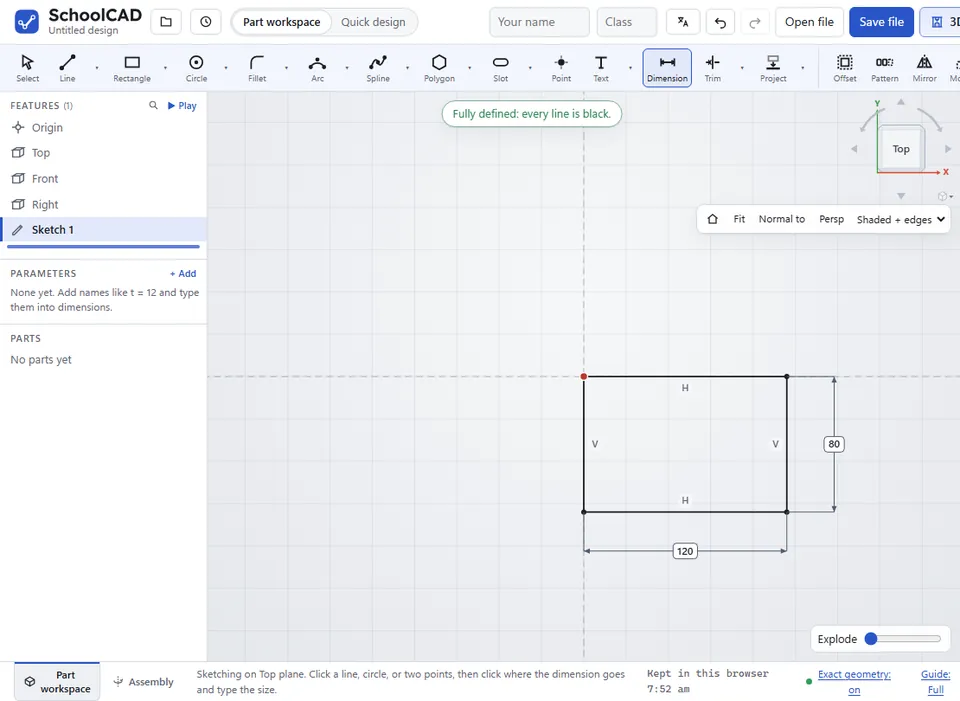
- Draw a closed shape in a sketch and click ✓ Finish sketch. Closed means there are no gaps: every line meets the next one end to end.
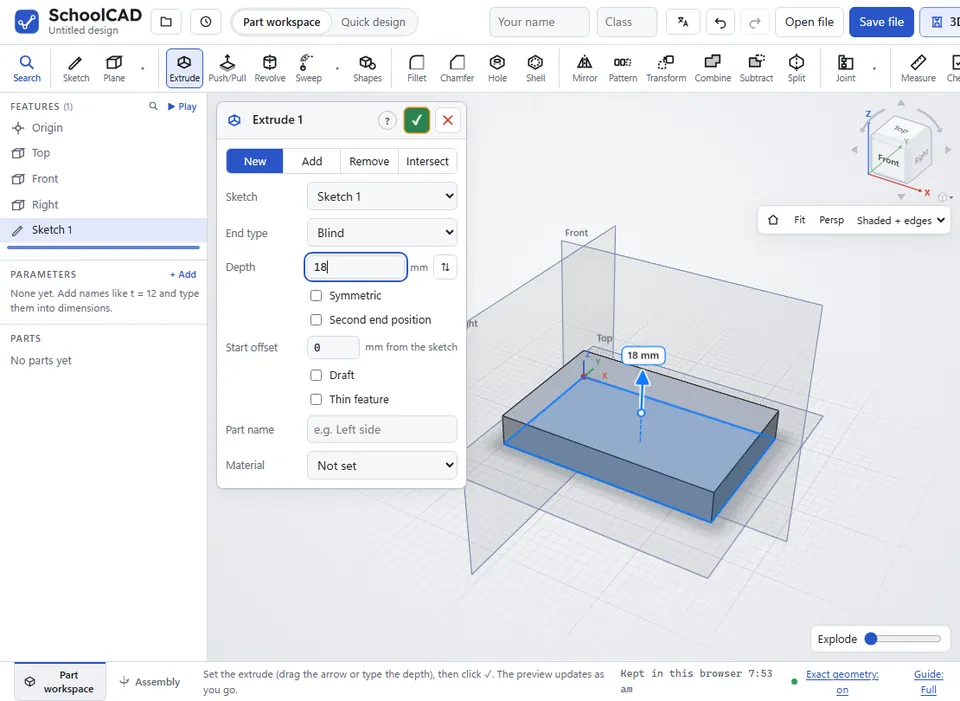
- Click Extrude, or press E. The newest sketch is chosen for you.
- Choose what it does: New, Add, Remove or Intersect.
- Drag the arrow on the model, or type the Depth.
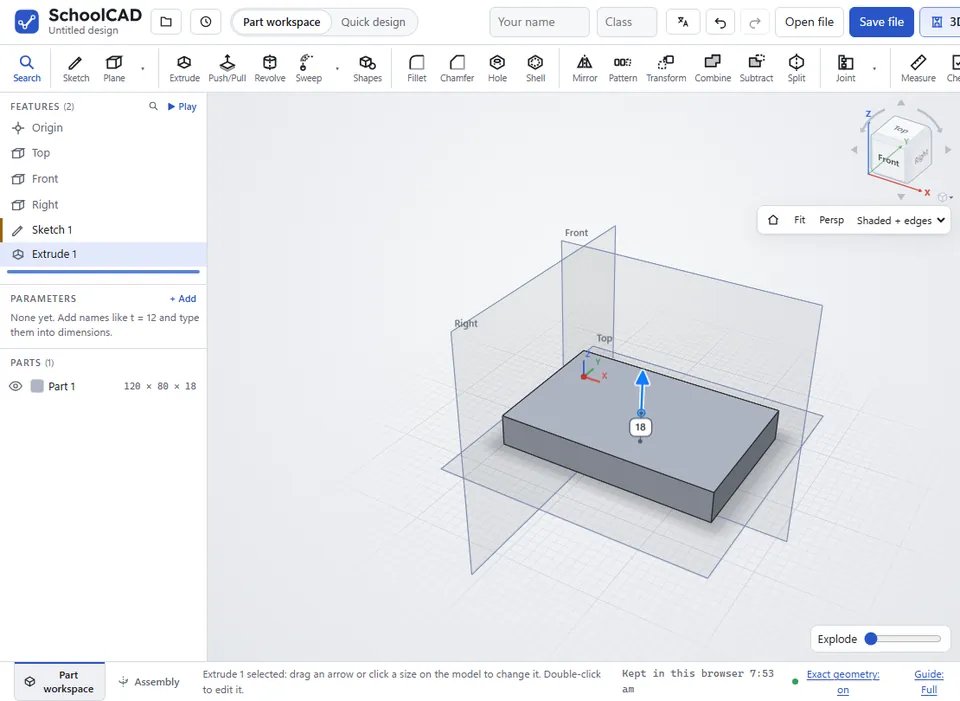
- Check the preview, then click ✓ or press Enter.
Thin walls from lines#
Tick Thin feature to make walls along the sketch's lines instead of filling its closed shapes, like Thin in Onshape's Extrude and Thin Feature in SOLIDWORKS. The lines do not need to be closed: draw the side view of a bracket or a phone stand as a chain of lines and arcs, and Thin gives it a thickness, like bending a strip of metal or acrylic. A closed shape becomes a hollow frame or tube.
- Draw the lines in a sketch, joined end to end (an open chain, or a closed shape). Extrude ticks Thin feature for you when the sketch has no closed shape.
- Type the Thickness of the wall.
- Choose its side: on the left of the lines as you drew them, or inside a closed shape, so it keeps its outside size. Click ⇅ beside Thickness to put it on the other side, or tick Mid-plane to centre it on the lines (SOLIDWORKS: One-Direction, Reverse Direction and Mid-Plane).
- Set the Depth as usual.
Separate chains become separate parts. Each chain must be lines joined end to end with no forks: where three lines meet at a point, draw each wall as its own chain.
Step by step#
Here is the whole thing on a 120 × 80 mm board, from the SchoolCAD video tutorial.
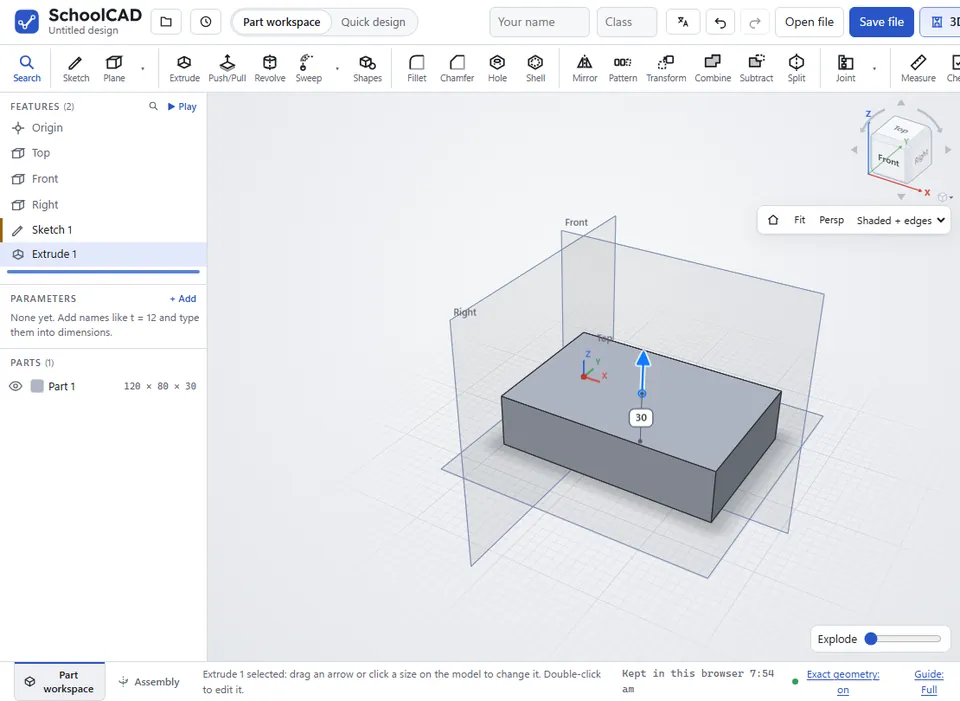
Options#
| Option | What it does |
|---|---|
| New | Makes a new part. Type a Part name (such as Left side) and choose its Material, for the parts list and the cut list. |
| Add | Joins the shape onto the part it touches. |
| Remove | Cuts the shape away from the parts it goes into. |
| Intersect | Keeps only the space where the shape and the part overlap. |
| Sketch | Which sketch to use. If it has more than one closed shape, click a shape in the view to leave it out or put it back. |
| End type | Blind goes as far as the Depth. Up to next goes as far as the next face in its way: a cut goes through the first wall it meets (a hole through the floor of a box, not the lid as well), an add stops where it touches the next part (Onshape: Up to next · SOLIDWORKS: Up To Next). Up to face stops at a flat face you click, and follows that face if it moves later; its Offset stops that many mm short of the face, or past it with a minus number (Onshape: Offset distance · SOLIDWORKS: Offset From Surface). Up to part goes up to a part you click (or choose in the list), and its end takes the shape of that part where it meets it, such as a leg up to the curved underside of a seat (Onshape: Up to part · SOLIDWORKS: Up To Body). The part must be in the way of the whole shape. Up to vertex stops level with a corner of a part you click, or a point of a sketch shown in the view (measured square to the sketch), on whichever side of the sketch the corner is, and follows that corner if it moves later. It also has an Offset. Use it for a post as tall as a box, or a cut down to the level of a ledge (Onshape: Up to vertex · SOLIDWORKS: Up To Vertex). Through all goes right through the parts. |
| Depth | How far it goes, in mm. With Symmetric ticked, it is the total depth (mm in all). |
| ⇅ (Opposite direction) | The arrow button beside Depth (for Up to next and Through all, on its own row): sends it the other way. |
| Symmetric | For Blind and Through all: goes half each way from the sketch plane. (SOLIDWORKS: Mid Plane) |
| Start offset | For Blind and Symmetric: starts this many mm from the sketch plane, along the extrude, instead of on it, such as a shelf that starts 5 mm above a sketch on the floor. A minus number starts it the other side. (SOLIDWORKS: From Offset) |
| Second end position | Blind only: goes the other way from the sketch as well, by its own Depth 2. (Fusion: Two sides) |
| Thin feature | Walls along the sketch's lines, open or closed, instead of solid shapes (see above). Thickness, ⇅ and Mid-plane set the wall. |
| Draft | For a depth (Blind, Symmetric or a second end): the walls lean in by the Draft angle going away from the sketch plane, so a vacuum-forming mould or a casting comes out of its mould. The shape is as sketched at the sketch plane. Tick Draft outward to lean them out instead. A cut with draft makes a pocket that is narrower at the bottom. (Onshape: Draft · SOLIDWORKS: Draft On/Off, Draft outward) |
| Merge scope | For Add, Remove and Intersect. Merge with all ticked: it works on every part it meets. Untick it, then tick the parts it should change, or click them in the view. (SOLIDWORKS: Feature Scope) |
Tips#
- For a vacuum-forming mould, tick Draft and use 3° to 5°, so the plastic lifts off. For the walls of a part that is already made, use the Draft tool instead.
- When you drag the arrow, the steps get smaller as you zoom in. Hold Shift for finer steps, or press Esc to put the depth back.
- Drag a New extrude into a part and it turns into a cut for you.
- You can type a sum for the depth, such as
600-2*19, or the name of a parameter such ast. - To change an extrude later, double-click it in the feature tree. Everything made after it updates too. Or click it once in the tree and drag its arrow on the model.
- For timber parts, make the depth the board thickness (such as 12 or 19 mm), so the cut list shows real board sizes.
- To cut along a face without drawing a sketch first, try Push/Pull.
If it does not work#
- A 30° draft is too steep for this depth: the shape closes up. The walls lean in so far that they meet before the depth is reached. Use a smaller angle or a shallower extrude.
- Three or more lines meet at one point. Thin walls follow chains with no forks. Draw each wall as its own chain, or untick Thin feature and draw a closed shape.
- A 4 mm wall is too thick for the curves in this sketch. An arc is tighter than the wall is thick on the side the wall is on. Try a thinner wall, or click ⇅ to put it on the outside of the curve.
- Part of the shape misses the part. With Up to part, the part you chose must be in the way of all of the shape. Make the shape smaller, or use Up to next or Up to face.
- The part is too thin or too curved over this shape. With Up to part, the extrude ends inside the part, so the part must be thicker than its surface rises and falls over the shape. Use a smaller shape, or Up to face.
- That corner is on the sketch plane. Pick a corner further along. With Up to vertex, the corner you clicked is level with the sketch, so the extrude would have no depth. Click a corner higher up or lower down.
- The corner to extrude up to has gone. An earlier change took that corner away. Edit the extrude and click a corner again.
- This sketch has a gap, so it has no closed shape yet. Edit the sketch and look for a line end that does not meet another line. Select that end and the point it should meet, then click Coincident to join them.
- The cut goes the wrong way, or misses the part: click the ⇅ arrow beside Depth (Opposite direction), or choose Through all.
- Remove does nothing: the shape does not reach the part. Make the depth bigger, or check the parts ticked under Merge scope (or tick Merge with all).