Revolve
Spin a sketch around an axis to make round parts, like knobs, wheels, turned legs and handles.
- Revolve VPart workspace toolbar
| SchoolCAD | Onshape | Fusion | SOLIDWORKS |
|---|---|---|---|
| Revolve | Revolve | Revolve | Revolved Boss/Base Revolved Cut |
Revolve spins a sketch around a line, the way a lathe turns a piece of timber. You draw half of the outline, like a knob sliced down the middle, and Revolve spins it round to make the solid part. Use it for knobs, wheels, turned legs, handles, bowls and spinning tops.
It can also add a round shape onto a part, or cut one out of it, such as a groove around a leg.
How to use it#
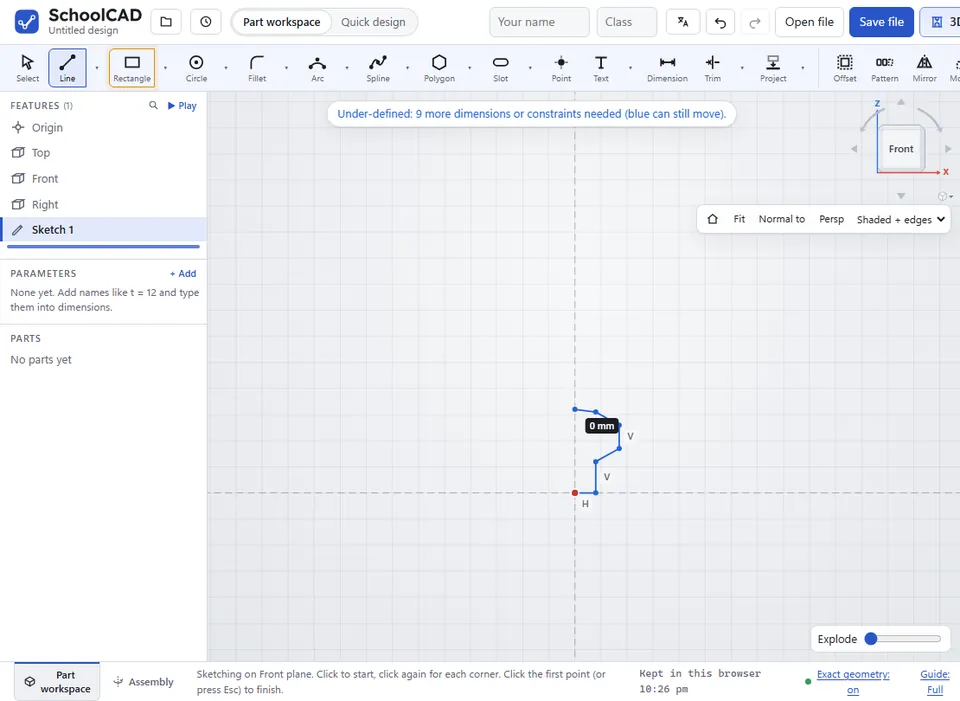
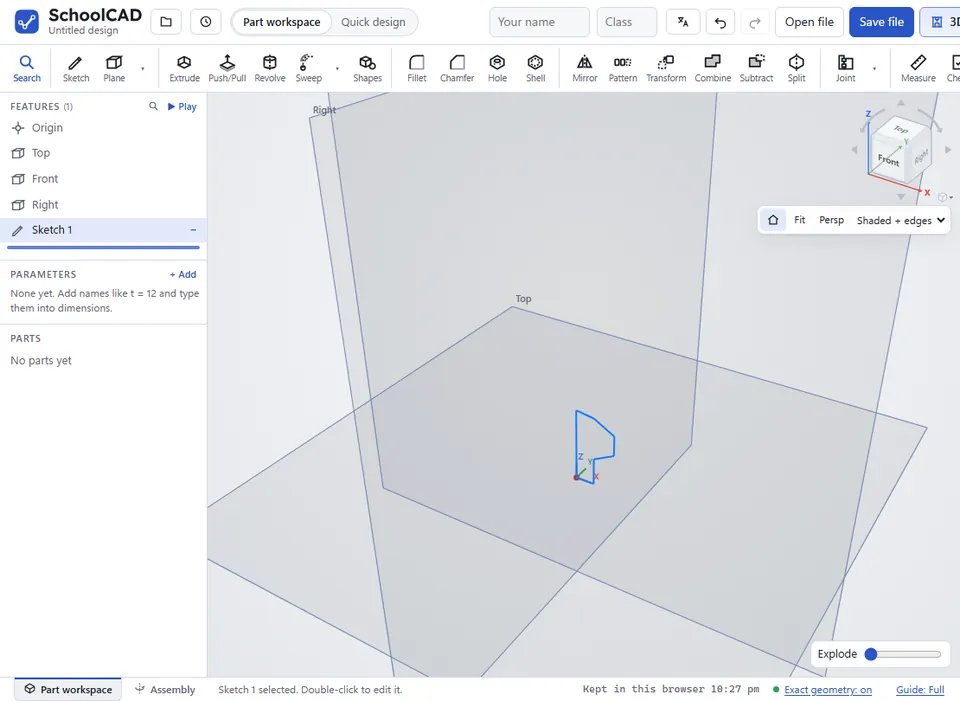
- In a sketch, draw half of the outline as a closed shape. Keep all of it on one side of the axis: the line it will spin around. Finish the sketch.
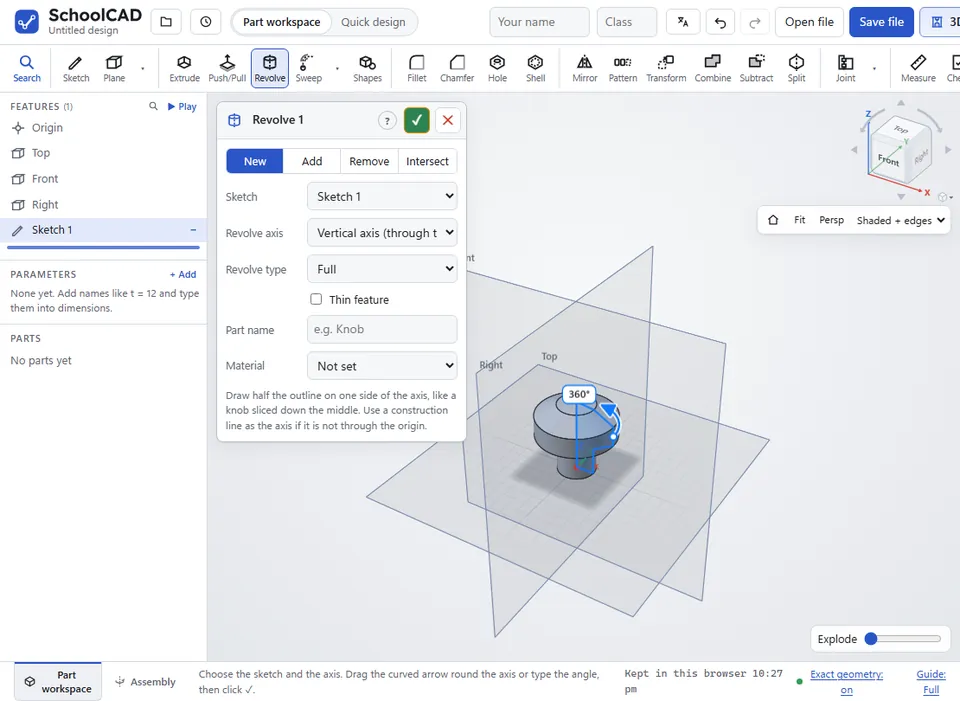
- Click Revolve, or press V. A sketch is chosen for you: change it in Sketch if it is the wrong one.
- Choose the Revolve axis.
- Leave Revolve type on Full to go all the way round (360°). For part of a turn, choose One direction and type the Revolve angle (or drag the curved arrow round the axis), or Symmetric for half of it each way from the sketch.
- Choose New, Add, Remove or Intersect.
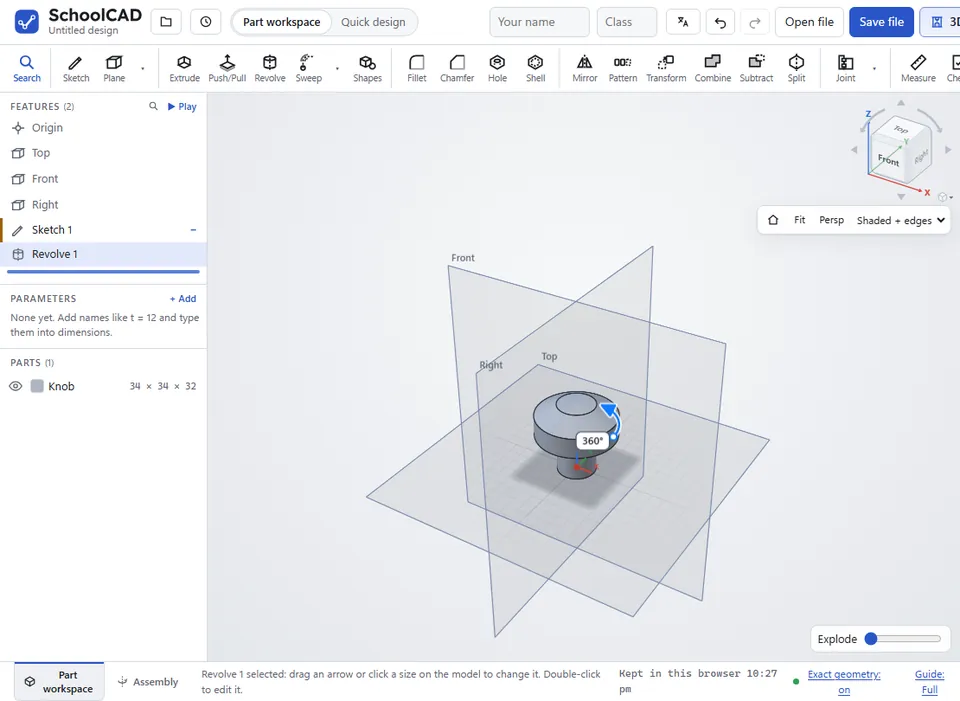
- Check the preview, then click ✓ or press Enter.
Step by step#
Here is the whole thing on a drawer knob, from the SchoolCAD video tutorial.
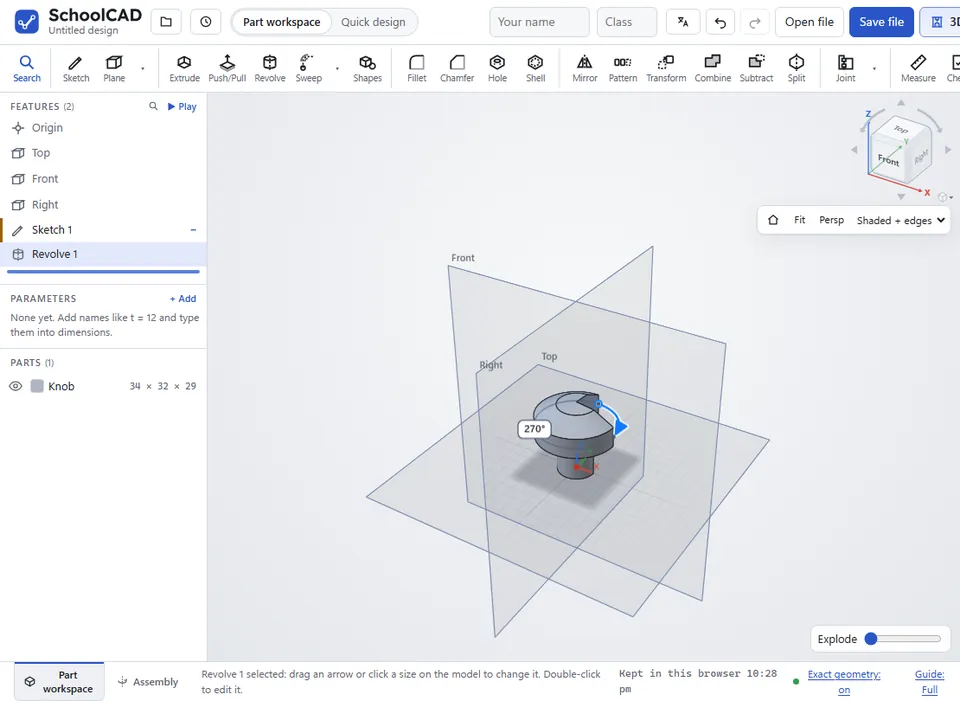
270.Options#
| Option | What it does |
|---|---|
| New | Makes a new part. Type a Part name (such as Knob) and choose its Material. |
| Add | Joins the shape onto the parts it meets. |
| Remove | Cuts the shape out of the parts it meets, such as a groove around a leg. |
| Intersect | Keeps only the space where the shape and the part overlap. |
| Sketch | Which sketch to spin. If it has more than one closed shape, click a shape in the view to leave it out or put it back. |
| Revolve axis | The line it spins around: Vertical axis (through the origin), Horizontal axis (through the origin), or a construction line in the sketch (Construction line 1, Construction line 2 and so on). |
| Revolve type | As in Onshape: Full goes all the way round (360°). One direction turns by the Revolve angle from the sketch; ⇅ (Opposite direction) turns it the other way. Symmetric turns half the angle each way from the sketch (SOLIDWORKS: Mid-Plane). Two directions turns by the Revolve angle one way and the Second revolve angle the other way, up to 360° in all (SOLIDWORKS: Direction 2). In Advanced mode, Up to vertex turns it round until it reaches a corner you click on a part, or a point of a sketch shown in the view, and Up to face until it reaches a flat face the axis lies in, such as the end of a pipe it joins (SOLIDWORKS: Up To Vertex, Up To Surface). The angle is worked out for you and changes when the corner or face moves; ⇅ goes round the other way. |
| Revolve angle | For One direction and Symmetric: how far round it goes, in degrees, up to 360. A smaller angle makes part of a turn, such as 180 for half a knob. |
| Merge scope | For Add, Remove and Intersect. Merge with all ticked: it works on every part it meets. Untick it to tick just the parts to change. |
| Thin feature | Spins the sketch's lines as a wall of a set Thickness, instead of filling a closed shape: draw the side of a cup, a vase or a lampshade as a chain of lines and arcs, and you get a hollow part. ⇅ puts the wall on the other side of the lines, and Mid-plane centres it. Revolve ticks Thin feature for you when the sketch has no closed shape. (Onshape: Thin · SOLIDWORKS: Thin Feature) See Extrude for how the side is chosen. |
Tips#
- The curved arrow moves in 5° steps. Hold Shift for 1° steps, or press Esc to put the angle back.
- For a part that stands up, like a chess piece or a lamp base, sketch on Front and spin it around the Vertical axis.
- If the axis does not go through the origin, draw it as a line in the sketch and make it a construction line: select it and press Q. Then choose it in Revolve axis.
- Draw the outline right up to the axis for a solid part. Leave a gap between the outline and the axis for a ring.
- To change a revolve later, double-click it in the feature tree, or click it once in the tree and drag its curved arrow on the model.
If it does not work#
- That face does not pass through the revolve axis. Pick a flat face the axis lies in, or a corner. With Up to face, the face must be flat with the revolve axis lying in it, like a face that ends a pipe bend.
- That corner is on the revolve axis. Pick one off the axis.
- The shape crosses the axis. Keep it all on one side of the axis line. Edit the sketch so no part of the shape goes over the axis. It can touch the axis.
- The sketch has no closed shape to revolve. Edit the sketch and join the ends of the lines.
- The axis line is missing from the sketch. The construction line used as the axis was deleted. Choose another Revolve axis.
- The part lies down when it should stand up: choose the other axis.
- Nothing to add to: it does not touch a part. Choose New instead. Move the shape so it touches the part, or choose New.