Pattern
Repeat a cut, a hole or whole parts in a row, around a circle or along a curve, for dowel holes, slats, vents, spokes and chain links.
- Pattern PPart workspace toolbar
| SchoolCAD | Onshape | Fusion | SOLIDWORKS |
|---|---|---|---|
| Pattern | Linear pattern Circular pattern Curve pattern | Rectangular Pattern Circular Pattern Pattern on Path | Linear Pattern Circular Pattern Curve Driven Pattern |
Pattern repeats something you have already made, so you do not have to model every copy. The copies can go in a row (a linear pattern), around a circle (a circular pattern), or along a Curve you sketch (Onshape: Curve pattern).
There are two kinds, the two Pattern type tabs:
- A Part pattern copies whole parts, such as the slats of a bench seat or the legs of a round stool.
- A Feature pattern repeats features: an extrude, a cut, a hole or a revolve, or several of them together (a slot and the hole beside it). Use it for a row of shelf-pin holes, the vents in a speaker box, or holes around a knob.
How to use it#
- Make the first one: the hole, the cut or the part.
- Click Pattern, or press P.
- Under Pattern type, choose Feature and tick it (or several) in Features to pattern. Or choose Part and tick the parts under Parts to pattern, or click them in the view.
- Choose Linear, Circular or Curve.
- Type the Instance count, then the Distance or the Angle. For Curve, choose the sketch in Path to pattern along.
- For a grid, tick Second direction and set Direction 2, Distance 2 and Instance count 2.
- To leave a copy out, click its dot in the view (see Skip instances below).
- Check the preview, then click ✓.
Pattern starts with what you selected. Parts you selected make a part pattern. A feature you clicked in the feature tree makes a feature pattern. With nothing selected, it repeats your newest extrude, cut, hole or revolve.
Step by step#
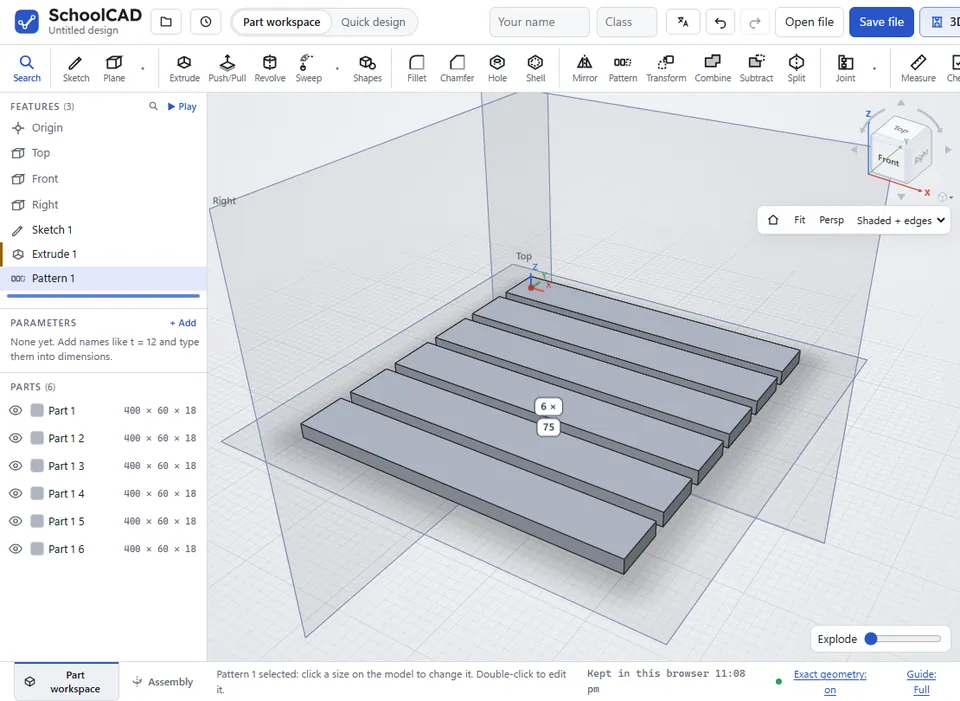
Here is the whole thing on the slats of a bench seat, from the SchoolCAD video tutorial.
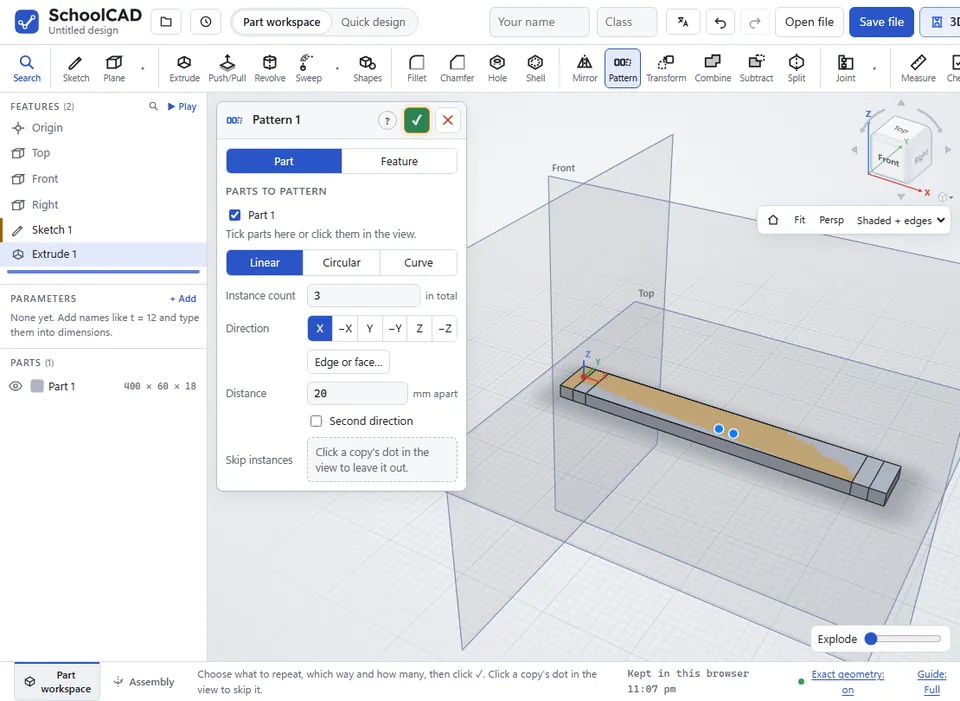
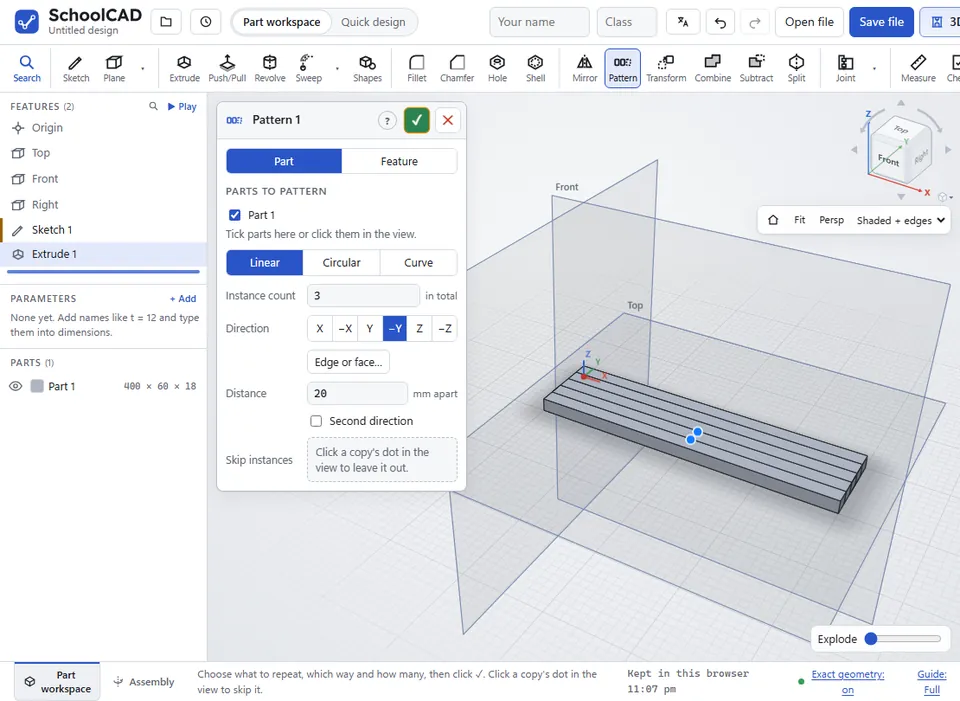
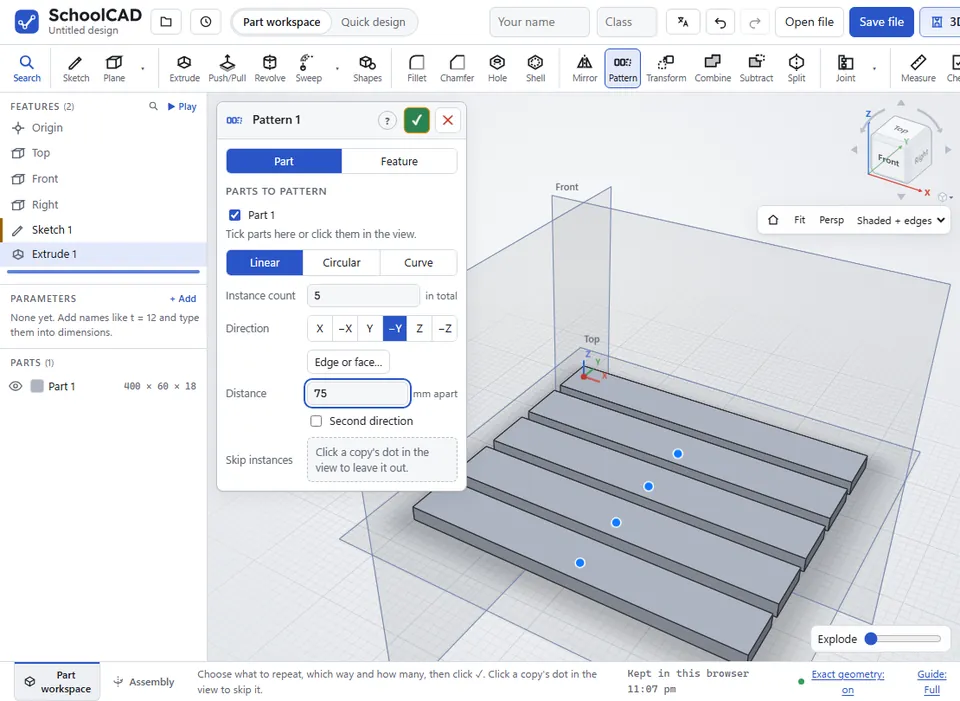
5, counting the first one) and the Distance from one slat to the next (75).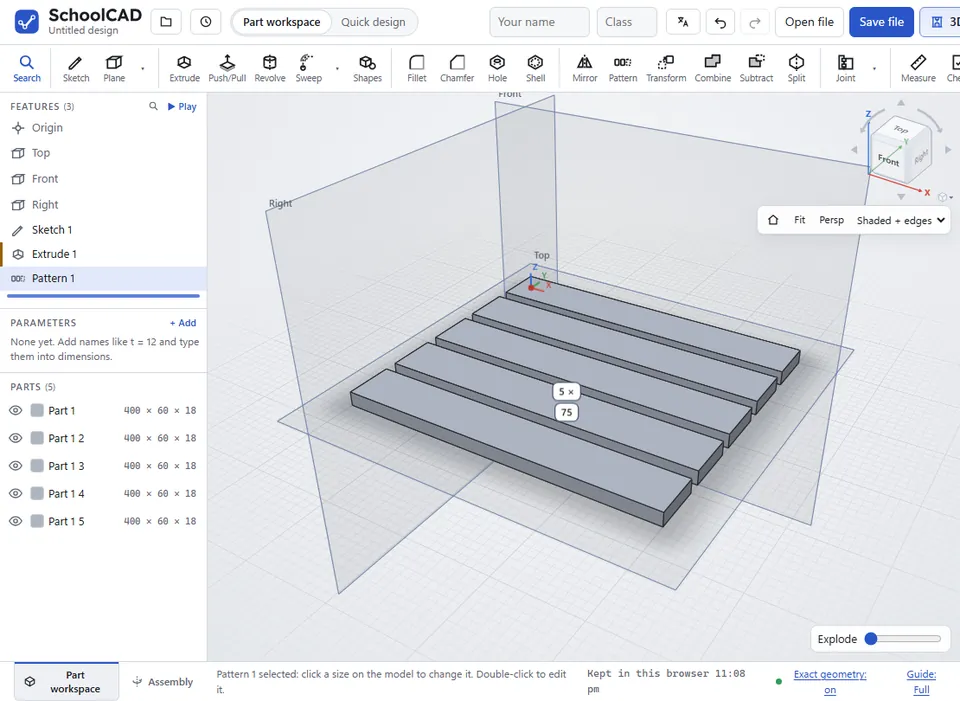
Options#
| Option | What it does |
|---|---|
| Part | Pattern type: copies whole parts. Tick them under Parts to pattern, or click them in the view. |
| Feature | Pattern type: repeats features. Tick them in the Features to pattern list; each is repeated the same way (Onshape: Features to pattern). Cuts and holes say (cut). |
| Linear | The copies go in a straight row. |
| Circular | The copies go around an axis, like the spokes of a wheel. |
| Curve | The copies follow a path you sketch: joined lines, arcs or a spline, or a circle for a closed loop. (SOLIDWORKS: Curve Driven Pattern) |
| Instance count | How many in total, counting the first one: 4 makes the first one and 3 copies. From 2 to 100. |
| Direction | Linear only: which way the row goes. X is across, Y is back and Z is up. −X, −Y and −Z go the other way. Edge or face: click an edge of the model and the copies go along it (such as up a sloping rail), click a flat face and they go square to it, or click a round face and they go along its axis; ⇅ turns the direction round (Onshape and SOLIDWORKS: pick an edge or a face). |
| Distance | Linear: how far it is from one copy to the next, in mm. Curve with Distance spacing: how far apart the copies are along the path. |
| Axis of pattern | Circular only: X, Y or Z, through the origin (the point 0, 0, 0). Or Round face: click a round face, and the copies go round its axis, such as holes round a round table top or a wheel that is not on the origin (Onshape and SOLIDWORKS: pick an axis or a cylindrical face). |
| Angle | Circular only: how far round the copies go. 360 is a full circle. |
| Path to pattern along | Curve only: the sketch with the path. Start the path at the thing you are repeating: the first copy is the original, and the others follow the path from there. |
| Spacing | Curve: Equal spacing spreads the copies evenly over the whole path. Distance puts them a set Distance apart along it (copies that would go past the end are left out). Linear, in Advanced mode: Distance, or Up to reference: click a corner, a sketch point or a flat face (Reference), and the copies spread out so the last one is there, less the Offset, such as shelf pin holes from 30 mm in from one end to 30 mm in from the other. The spacing is worked out from the Instance count and changes when the part does (SOLIDWORKS: Up to reference). |
| Orientation type | Curve only: Tangent to curve: each copy turns with the path, like beads on a string. Locked: every copy faces the same way as the first. |
| Second direction | Linear only: copies in a second direction too, for a grid such as a peg board, a speaker grille or a row of shelf pin holes on both sides. Set Direction 2, Distance 2 and Instance count 2: 4 along X and 3 along Y make 12 in all. (Onshape: Second direction · SOLIDWORKS: Direction 2) |
| Skip instances | Each copy has a dot in the view. Click a dot to leave that copy out (it turns into a red ring), and click the red ring to put it back. Clear puts them all back. The first one (the original) cannot be skipped. (Onshape: Skip instances · SOLIDWORKS: Instances to Skip) |
Tips#
- With an Angle of 360, the copies are spread evenly all the way round. With a smaller angle, the last copy lands on that angle: 3 instances over 90° sit at 0°, 45° and 90°.
- For a circular pattern round a round part that is not on the origin, choose Round face as the axis and click the part's round side.
- You can type a sum or a parameter for the distance, such as
450/5. - Click the pattern in the feature tree to see its number and spacing on the model. Click one to change it.
- Change the first one, and every copy changes too.
- Copies from a part pattern are named like the first part, with a number: Slat 2, Slat 3.
- To repeat shapes inside a sketch, use the sketch Pattern.
- A Curve pattern suits a row of lights round a curved shelf, fence pickets along a curved path, or the links of a chain. On a circle, the copies go all the way round without two landing on the start.
If it does not work#
- The reference is not ahead of the first copy along the pattern direction. With Up to reference, the corner or face is behind the thing repeated. Turn the direction round (such as −X instead of X), pick another reference, or make the Offset smaller.
- That face lies along the pattern direction, so the copies never reach it. Pick a face across the direction, such as the end of the board, or a corner.
- Make an extrude, cut, revolve or hole first. A feature pattern needs one of these before it. Or choose Part under Pattern type.
- The feature to repeat must come before the pattern. Drag the pattern below that feature in the feature tree.
- Some copies are missing. A copy of a cut only cuts where it meets a part. Check the Direction and the Distance.
- The copies go the wrong way. Choose the other direction, such as −X instead of X.