Line
Draw straight lines from corner to corner to make outlines, such as the side of a phone stand or a bookend.
- Line LSketch toolbar
- CenterlineSketch toolbar: under the ▾ next to Line
- Midpoint lineSketch toolbar: under the ▾ next to Line
| SchoolCAD | Onshape | Fusion | SOLIDWORKS |
|---|---|---|---|
| Line | Line | Line | Line |
| Centerline | Line (construction) | Construction line | Centerline |
| Midpoint line | – | – | Midpoint Line |
Line draws straight lines one after another, like joining the dots. Each click adds a corner. Use it for outlines that are not plain rectangles: the side of a phone stand, a bookend, the legs of a step stool.
How to use it#
- In a sketch, click Line, or press L.
- Click where the first line starts.
- Click again for each corner. As you move, the pointer shows the length in mm.
- To close the shape, click the first point again. The chain stops there.
- To stop without closing it, press Esc or double-click. Press Esc again to go back to Select.
Then use Dimension to give each line its exact length.
Centerline and Midpoint line#
The ▾ beside Line has two more ways to draw a line, as in SOLIDWORKS:
| Tool | What it draws |
|---|---|
| Centerline | A dashed construction line, for the axis of a Revolve, a mirror line for the sketch Mirror or a guide. It is not part of the shape. (Onshape: a line with Construction on.) |
| Midpoint line | Click the middle of the line, then one end: the other end goes the same distance the other way, and the first point stays in the middle. Good for a line centred on the origin. |
Snapping#
- Horizontal and vertical: a line drawn nearly level becomes exactly horizontal, and a nearly upright line becomes vertical. The pointer shows H or V, and the line keeps a Horizontal or Vertical constraint.
- Parallel and square: a line drawn nearly parallel to another line snaps exactly parallel, and nearly square to it (90°) snaps perpendicular. The pointer shows ∥ or ⊥, the other line lights up, and the new line keeps a Parallel or Perpendicular constraint, so it stays that way when you dimension. It works best carrying on from the line before: draw a shape corner by corner and each corner comes out square.
- Lining up: when the pointer is straight across from, or straight up from, another point, it lines up with it and a dotted guide shows which point. Past the end of a line, it runs on along that line. A level line stops exactly under a point you line it up with. Lining up only places the point; it adds no constraint.
- Ending on a line: a level, upright, parallel or square line dropped onto another line ends where it meets it.
- Tangent (T): a line started from the end of an arc carries on smoothly from it when drawn close to that way, and a line dropped near where it would just touch a circle or arc ends exactly there. Both keep a Tangent constraint, and the circle or arc lights up.
- Points, lines and circles: click near a point (such as the origin or the end of another line) and the new line joins it. Click on a line or a circle and the new point stays on it.
Edges of the part you are sketching on guide the pointer too. To stop the snapping, untick Horizontal and vertical snapping while drawing lines or Line up with other lines and points while drawing in Settings → Sketch.
Step by step#
Here is the whole thing on a key tag, from the SchoolCAD video tutorial.
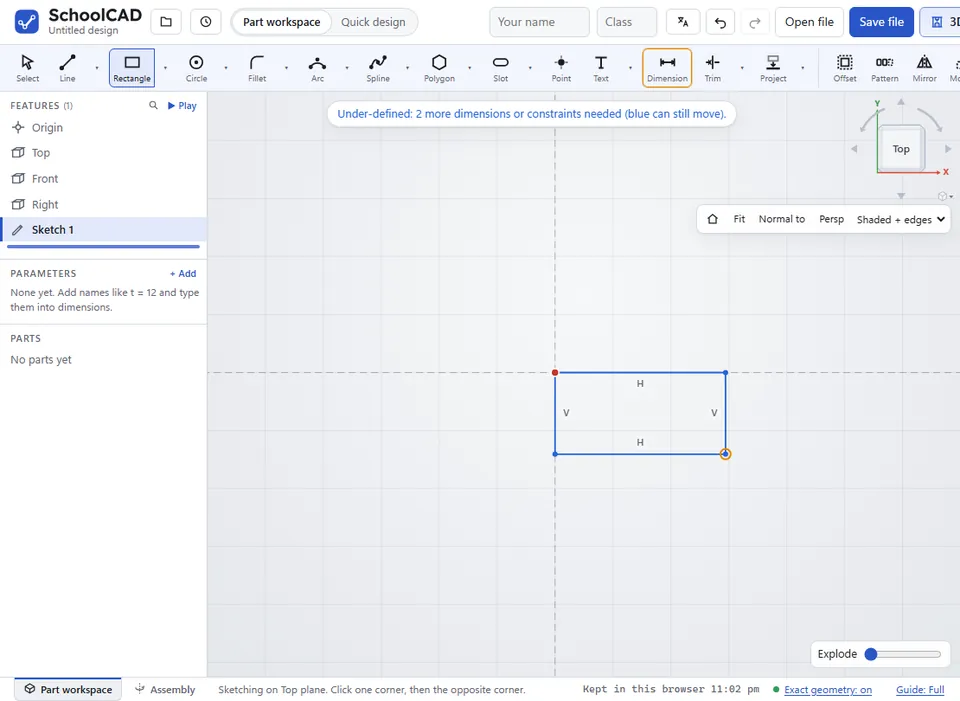
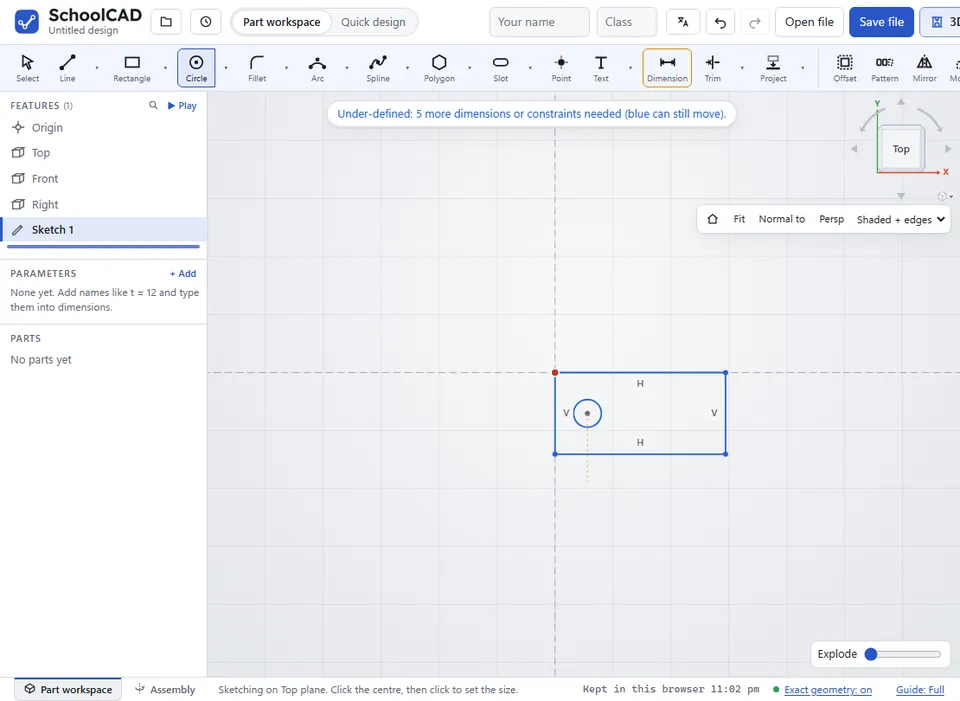
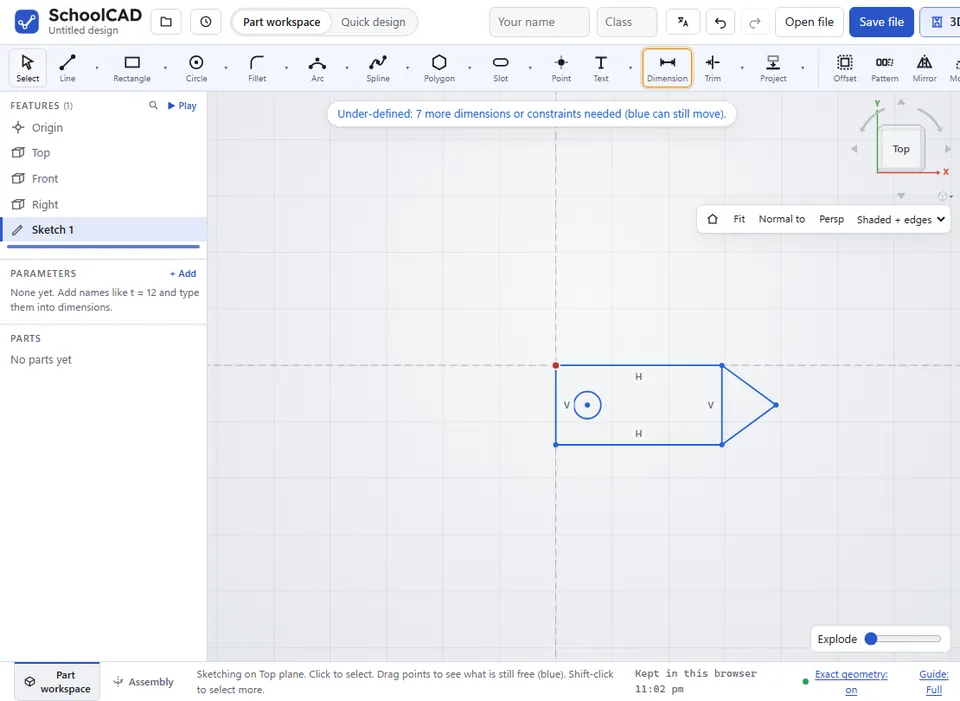
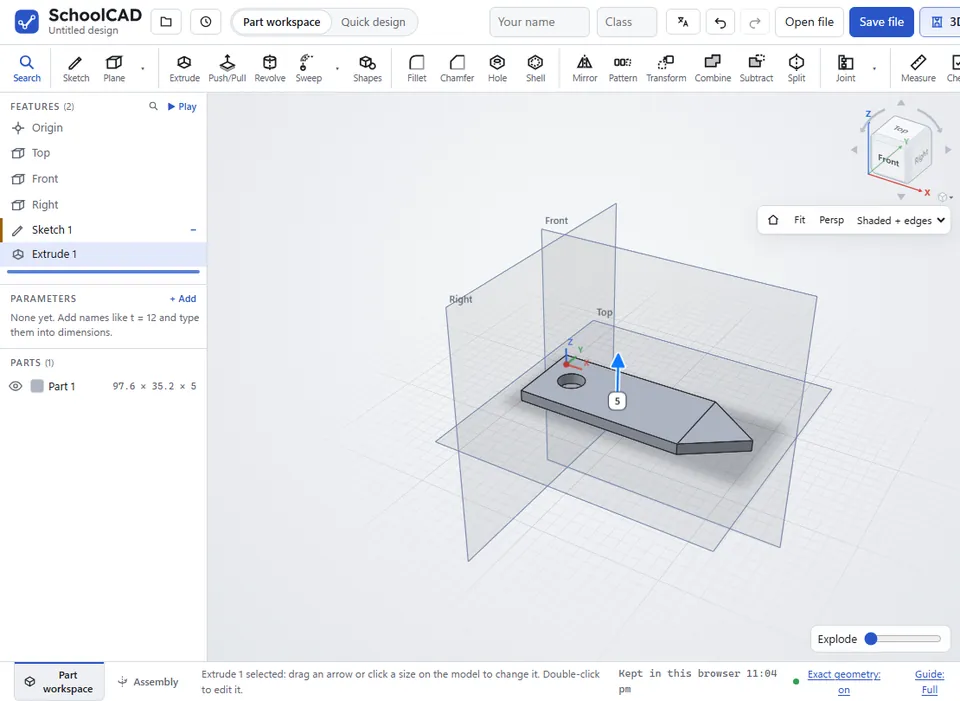
5. The circle comes through as a hole.Tips#
- Draw roughly, then dimension. The sizes you type move the lines for you.
- Start on the origin, so the shape is tied in place.
- For a sloping line at an exact angle, use Dimension on two lines and type the angle.
- To carry on with a smooth curve from the end of a line, use Tangent arc (see Arc).
- For a dashed centre line, draw a line, select it and press Q (see Construction).
If it does not work#
- The line jumps to level when you want a slight slope: it snapped to horizontal. Draw it at a steeper slope, then set the exact angle with a dimension.
- Extrude says the sketch has a gap: one end does not meet another line. With Select, click the loose end, Shift-click the point it should meet, then click Coincident (•).