Split
Cut a part in two along a plane, such as a box and its lid, or two halves that each fit on a 3D printer.
- Split YPart workspace toolbar
| SchoolCAD | Onshape | Fusion | SOLIDWORKS |
|---|---|---|---|
| Split | Split | Split Body | Split |
Split cuts one part into two parts along a flat plane. Use it to cut the lid off a box, or to cut a big model into two halves that each fit on the 3D printer.
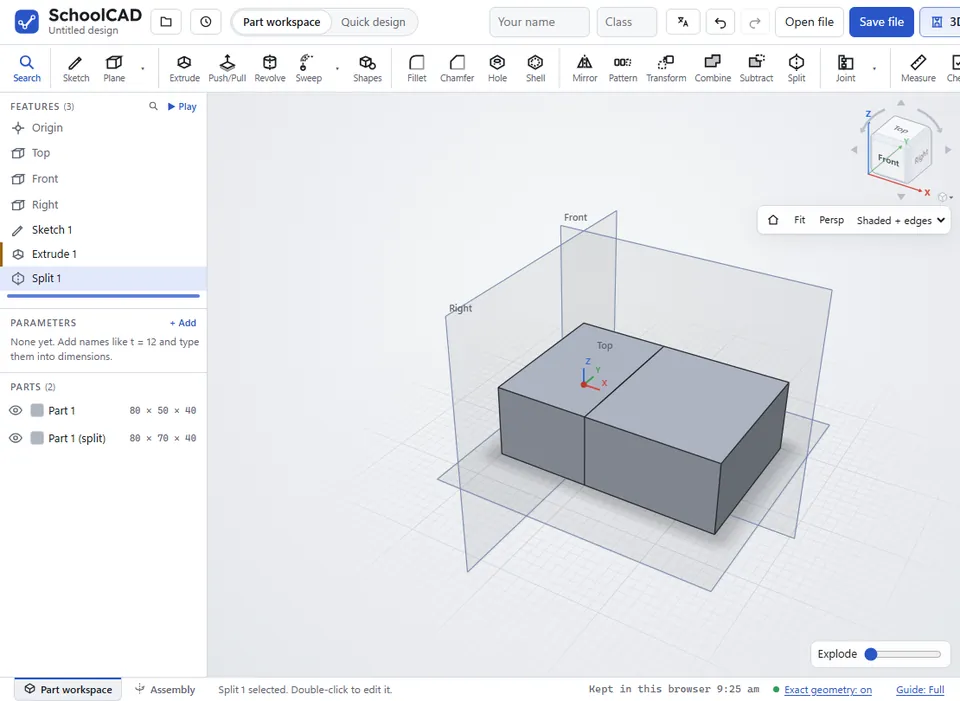
One piece keeps the part's name. The other piece becomes a new part, with (split) on the end of its name.
How to use it#
- Click Split, or press Y.
- Choose the part in Parts to split, or click it in the view.
- Choose the Entity to split with: the Top plane, Front plane or Right plane, or a plane you made.
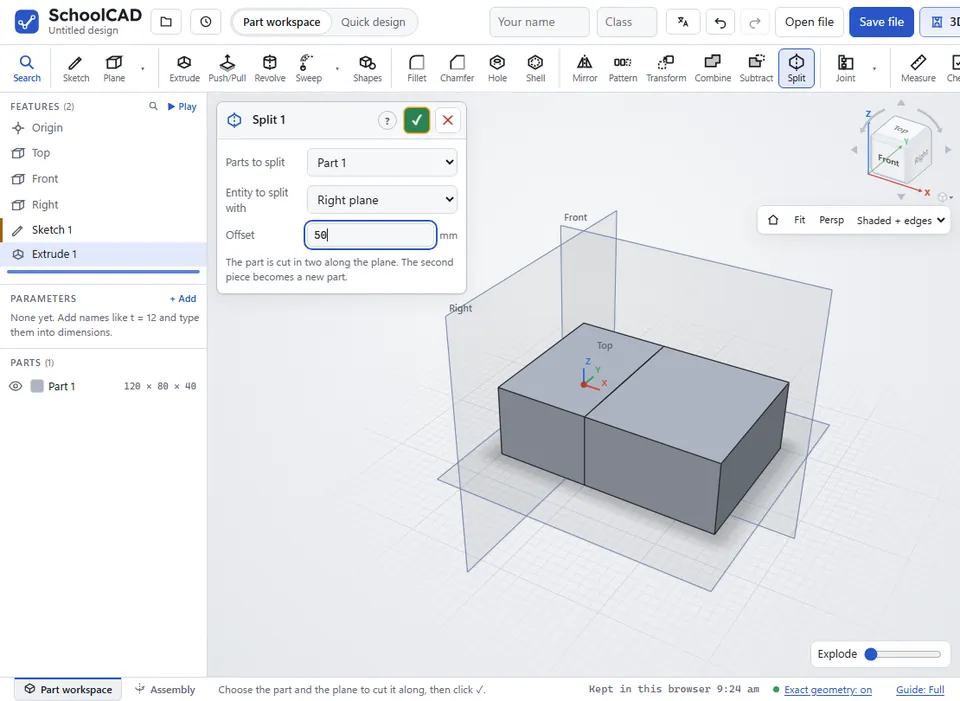
- For the Top, Front or Right plane, type an Offset to move the cut to where you want it.
- Check the preview, then click ✓.
Step by step#
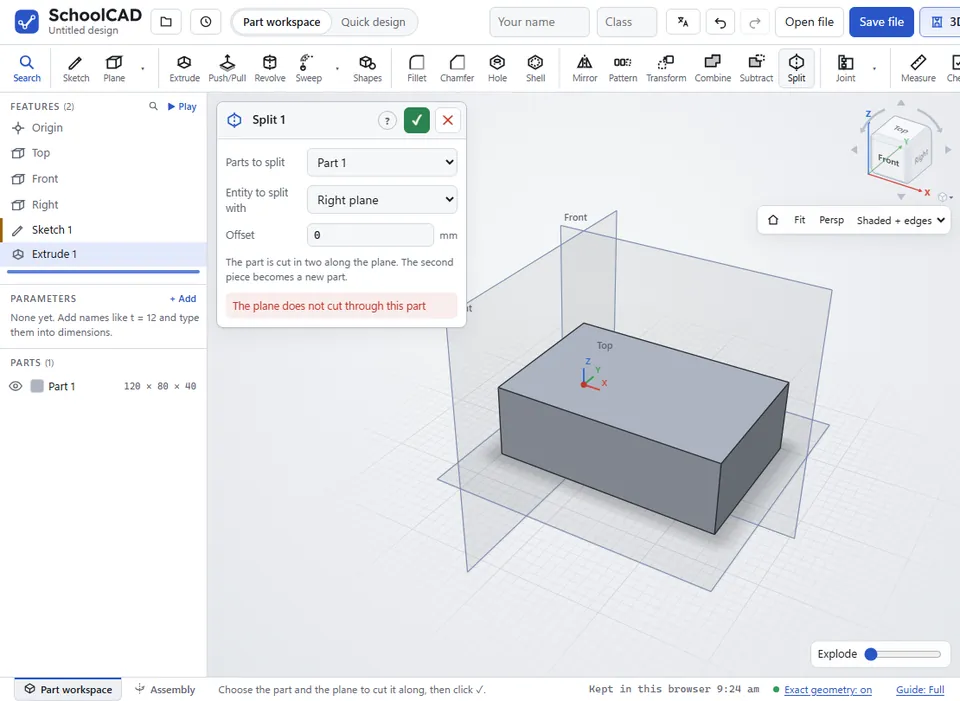
Here is the whole thing on a 120 × 80 × 40 mm block, from the SchoolCAD video tutorial.
Options#
| Option | What it does |
|---|---|
| Parts to split | The part to cut in two. You can also click it in the view. |
| Entity to split with | The plane to cut along: Top plane, Front plane, Right plane, or a plane you made. Or a sketch, marked (a line across the part): the part is cut along the line, arc or spline drawn in it, straight through square to the sketch, like a jigsaw cut seen from above (Onshape: Split with a face · SOLIDWORKS: Split with a sketch). Draw the line right across the part, or a closed shape on it to cut that shape out. The piece on the left of the line, as you drew it, or inside the shape, becomes the new part. |
| Offset | Top, Front and Right planes only: moves the plane this many mm. |
Tips#
- To cut at an angle, or along a face of the part, make a Plane first. A plane can start from a face, and it can be tilted. Then choose it in Entity to split with.
- For a box with a lid: make a solid block, then Shell it with Hollow ticked (no faces picked), which makes it hollow and closed. Then split it with the Top plane, moved up with Offset to where the lid starts.
- Double-click the new part in the parts list to give it a better name, such as Lid.
- One Split makes two pieces. For more pieces, add another Split.
If it does not work#
- The sketch does not cut through this part. The line must go right across the part, from one side to the other. Make it longer than the part.
- The sketch has more than one line or shape. Split along one chain of lines joined end to end, or one closed shape. Use a separate sketch for each cut.
- The plane does not cut through this part. The plane misses the part. Change the Offset, or choose a different plane.
- Choose the part to split. Choose a part in the Parts to split list, or click it in the view.
- The splitting plane (Plane 1) comes after this feature. Drag Plane 1 above it. Split can only use a plane made before it in the feature tree.