Plane
Make a new flat surface to sketch on, moved away from Top, Front, Right or a face, tilted at an angle, or halfway between two faces (Mid plane).
- Plane KPart workspace toolbar
| SchoolCAD | Onshape | Fusion | SOLIDWORKS |
|---|---|---|---|
| Plane | Plane | Offset Plane | Plane (Reference Geometry) |
Every sketch sits on something flat. Top, Front and Right are always there, and you can also sketch on any flat face of a part. Plane makes a new flat surface wherever you need one: higher up, further along, or tilted. Think of it as a sheet of glass you can put anywhere.
Use a plane to:
- draw the top shape of a loft, such as the top of a lamp shade, above a shape on Top
- sketch on a slope, such as the leaning back of a phone stand
- mirror or split parts somewhere that is not Top, Front or Right
- find the middle of a board, to mirror a hole or a slot from one side to the other (Mid plane)
The Plane type list at the top works like Plane type in Onshape:
| Plane type | What it makes | In Onshape and SOLIDWORKS |
|---|---|---|
| Offset or angle | A plane moved away from Top, Front, Right or a face, and tilted if you like. | Onshape: Offset and Line angle. SOLIDWORKS: a plane at a distance or an angle. |
| Mid plane | A plane halfway between two flat faces that are parallel, such as the two sides of a board. | Onshape: Mid plane. SOLIDWORKS: pick two parallel faces and it makes the plane in the middle. |
| Line angle | A plane hinged on a straight edge of a flat face, lifted off the face by the Angle, like the lid of a box: 0° lies on the face, 90° stands straight up. | Onshape: Line angle. SOLIDWORKS: a plane through an edge, at an angle to a face. |
How to use it#
- Click Plane, or press K.
- Choose what it starts from: Top, Front, Right or A face. For A face, click a flat face of a part in the view.
- Type the Distance: how far the plane moves away, in mm.
- To tilt it, type an Angle, then choose Across or Up for Tilt about.
- Click ✓ or press Enter.
- To draw on it, click the plane in the view (or pick it in the feature tree), then click Sketch.
Line angle#
- Click Plane, then choose Line angle in Plane type.
- Click a straight edge of a flat face: click on the face, close to the edge.
- Type the Angle: how far the plane lifts off the face, hinged on the edge. Type a minus angle to tilt it down.
- Click ✓. Its across direction runs along the edge, so a sketch on it lines up with the edge.
Use it for the sloping back of a chair or a phone stand, hinged on the edge of the seat or the base.
Mid plane#
- Click Plane, then choose Mid plane in Plane type.
- Click the first flat face, then the second. They must be parallel: the two sides of a board, or faces on two different parts that face each other. The dialog says how far the plane is from each face.
- Click ✓. If the board gets thicker later, the plane stays in the middle.
To pick a face again, click its box (First face or Second face) and then click the face.
Step by step#
Here is the whole thing on a round stand 60 mm up, from the SchoolCAD video tutorial.
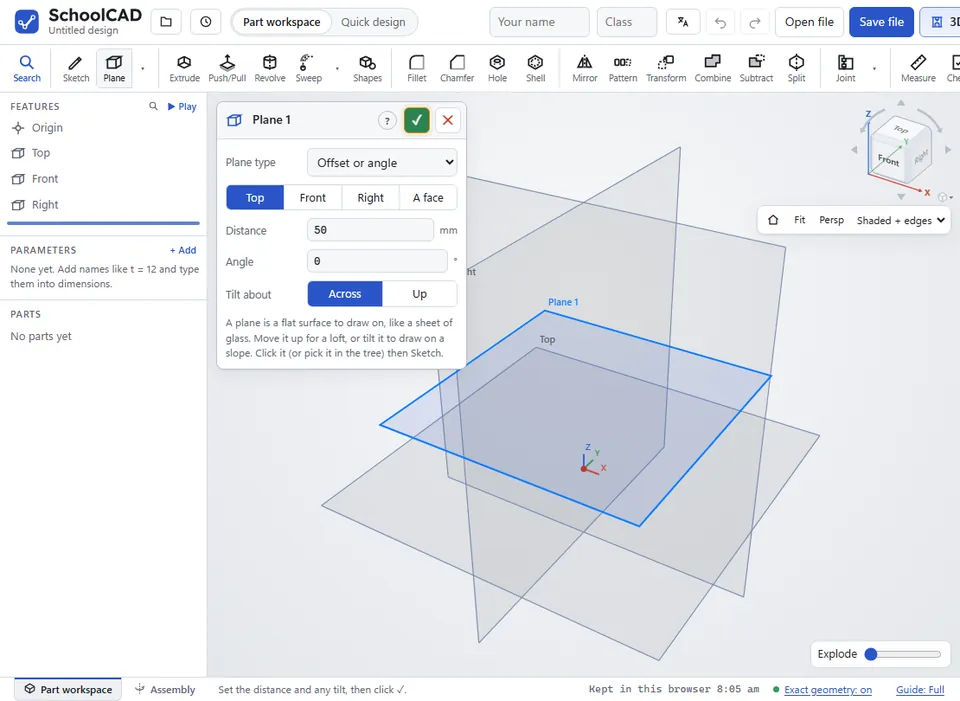
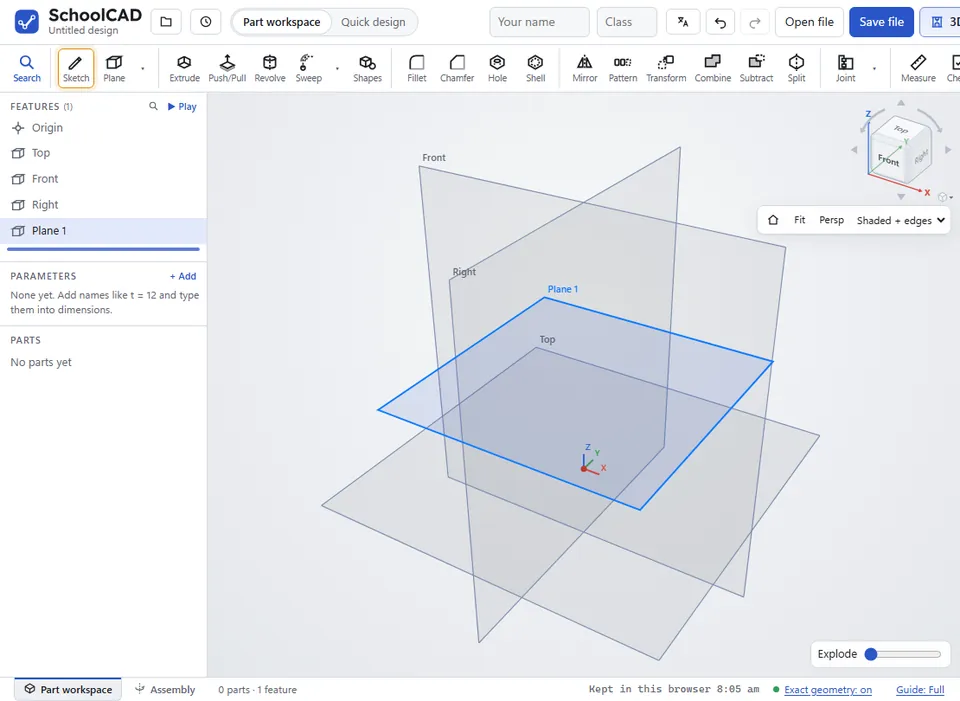
60, and click ✓.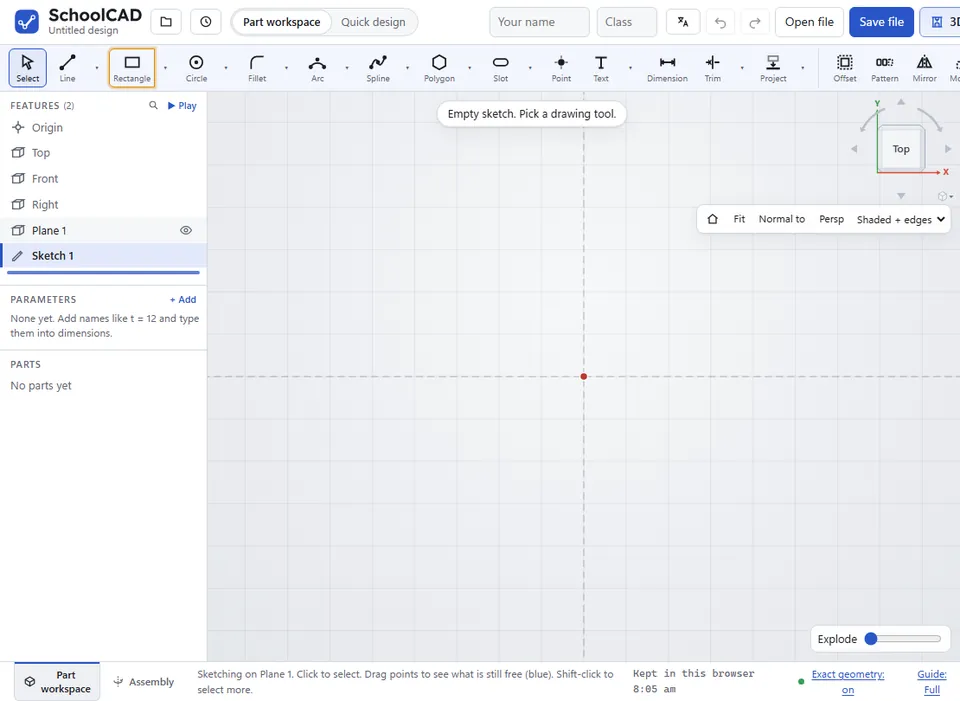

Options#
| Option | What it does |
|---|---|
| Top, Front, Right | Starts the plane from one of the three main planes. |
| A face | Starts the plane on a flat face of a part. Click the face in the view. |
| Distance | How far the plane moves away from where it starts, in mm. Type a minus number, such as -20, to go the other way. |
| Angle | Tilts the plane by this many degrees. Type a minus number to tilt it the other way. |
| Tilt about | Which way the hinge line runs when the plane tilts: Across or Up. |
| First face, Second face | For Mid plane: the two parallel faces the plane goes between. |
Tips#
- Sketches drawn on a plane follow it. Change the plane's Distance or Angle later, and the sketches, and the parts made from them, move with it.
- A plane on a face tilts about the middle of the face. A plane from Top, Front or Right tilts about the origin.
- To change a plane, double-click it in the feature tree.
- Too many planes in the way? Click the eye beside a plane in the feature tree to hide it, and again to show it.
- To mirror parts across a face, make a plane on that face first.
If it does not work#
- The two faces are not parallel. A mid plane needs two faces that are parallel, such as the top and bottom of a board. Click the box of the face that is wrong and pick another.
- Pick a different face. You clicked the same face twice. Pick the face on the other side.
- Pick a flat face. You clicked a curved face. A plane can only sit on a flat face.
- Pick a flat face to put the plane on. The face the plane was on has gone after an earlier change. Double-click the plane in the feature tree and click a flat face again.
- The plane is on the wrong side, or tilts the wrong way: type a minus number for the Distance or Angle, or swap Across and Up.
- You cannot click the plane to sketch on it: it may be hidden. Click its eye in the feature tree, or right-click it there and choose Show plane.